How to Build a Raised Garden Bed: A Step-by-Step Weekend Project
Share

If you've ever dreamt of a bountiful garden but have been discouraged by poor soil, stubborn weeds, or the physical strain of bending and kneeling, the raised garden bed is a complete game-changer.
A DIY raised garden bed elevates your gardening, literally and figuratively. The benefits are undeniable: you get complete control over your soil, a significant reduction in weeds, and a comfortable height that's easier on your back and knees. This guide will walk you through how to build garden box in a single weekend, a rewarding project for any level of gardener.
Planning and Preparation
A successful project starts with a good plan. Before you make the first cut, take a moment to prepare.
-
Choose the Best Location: Most vegetables and flowers need at least 6-8 hours of direct sunlight per day. Spend a day observing your yard to find the sunniest spot that's also convenient for watering.
-
Select Your Materials:
-
Wood: The classic choice. Cedar or redwood are naturally rot-resistant and long-lasting, though more expensive. Untreated pine is a budget-friendly option but will have a shorter lifespan. Avoid pressure-treated wood manufactured before 2003 for edible gardens.
-
Metal/Composite: Galvanized steel and composite wood offer excellent durability and a modern aesthetic.
-
-
Gather Your Tools and Safety Gear: For a simple wooden bed, you'll need: a tape measure, a saw (miter or circular saw is best), a power drill, exterior-grade screws (3-inch), a level, a shovel, and a wheelbarrow. Always use safety glasses and gloves.
Step-by-Step Construction Guide
For this guide, we'll build a classic 4 ft x 8 ft wooden bed, which is a great size for gardening for beginners.
-
Measure and Cut Your Materials: From your lumber (we recommend 2x6 inch boards), cut two pieces to 8 feet long and two pieces to 4 feet long. If you want a deeper bed (12 inches), you'll need to double these cuts.
-
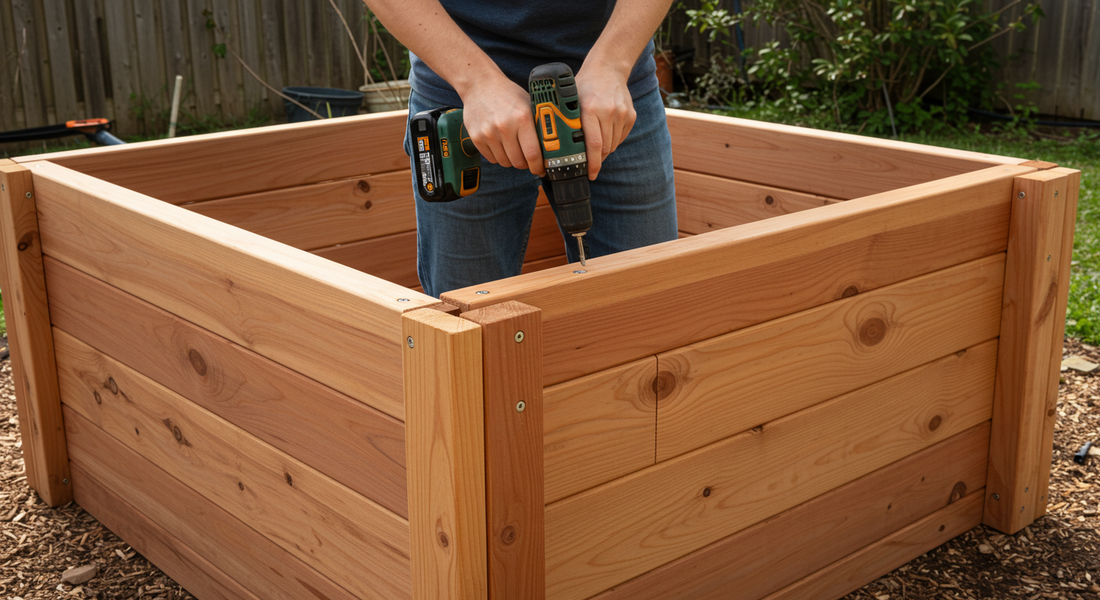
Assemble the Frame: On a flat surface, form a rectangle with your cut boards. Ensure the shorter boards are positioned on the inside of the longer boards to maintain the 4x8 ft dimension. Use your drill and 3-inch exterior screws to secure the corners. Drive at least three screws per corner for a strong, stable frame.
-
Level the Ground and Lay a Base: Position your assembled frame in its chosen location. Use a shovel to remove any sod and level the ground beneath the frame. Once level, lay down a layer of plain cardboard (with tape removed) on the bottom. This will smother any existing weeds and grass and will eventually decompose, adding organic matter to your soil.
Filling Your Bed: The Perfect Soil Recipe
The biggest advantage of a raised bed is creating the perfect soil environment from scratch. This is where the magic happens.
-
The "Lasagna" Method: A great way to fill your bed is by layering. Start with your cardboard base, then add a layer of twigs and small branches for drainage. Follow with layers of "greens" (like grass clippings and kitchen scraps) and "browns" (like shredded dry leaves and newspaper), finishing with a thick top layer of your final soil mix.
-
Ideal Raised Bed Soil Mix: For the top 12 inches of your bed, a rich mix is essential. A great all-purpose recipe is the "60-30-10" rule: 60% high-quality topsoil, 30% compost, and 10% an aeration element like perlite, vermiculite, or peat moss. This creates a soil that is nutrient-rich, holds moisture well, and drains properly.
-
How Much Soil You'll Need: To calculate the volume, multiply the length by the width by the height (in feet). For a 4 ft x 8 ft bed that's 1 ft deep: 4 x 8 x 1 = 32 cubic feet of soil.
Planting and First Steps
With your bed built and filled, you're ready for the fun part.
-
Best Plants for Raised Beds: Raised beds are perfect for a wide variety of plants. Vegetables like tomatoes, peppers, lettuce, and carrots thrive. Herbs of all kinds do exceptionally well. The controlled environment is also great for flowers.
-
Spacing and Irrigation: Because your soil is so nutrient-rich, you can often space plants a bit closer together than in a traditional garden. Consider installing a simple soaker hose or drip irrigation system while the bed is empty to make watering efficient and easy.
Conclusion: Enjoying the Fruits of Your Labor
Building a raised garden bed is a deeply satisfying project that pays dividends for years to come. You’ve not only built a functional garden structure but also created the perfect foundation for healthy, productive plants. As you watch your garden grow, you'll be able to enjoy the literal fruits (and vegetables) of your labor, all from a garden you built with your own two hands.
